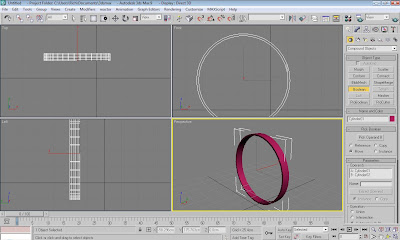
With the units set up ready for creating objects I began creating the wheel. I created a cylinder about 9cm thick with a radius of 70cm, which I thought would be a rough estimate of the object. Getting the exact measurements isn't required as of yet because everything can be scaled slightly before the mapping stage. I increased the sides to 18 and checked the 'smooth' box to get a much more rounded look.
To create the hole in the centre of the wheel I had to clone the wheel, lower the radius and increase the height so it could be positioned in the centre and then use the boolean tool.
I created another cylinder like the first but with a slightly smaller height and radius. I repeated the same process as above and booleaned a hole in the middle of the cylinder, however this time made the hole smaller.
This created a much more realistic looking wheel.
The next stage was to create the centre of the wheel. Using a chamfer cylinder I created a rounded off cylinder shape with 14 sides. A mesh smooth modifier made a good shape which matched the the real wheel.
In the research photos I found that the centre of the chamfered cylinder the shape grew slightly larger. I converted the shape into an editable poly and with lines sub selection I scaled the centre to make it slightly larger.
I made another chamfer cylinder and made it much smaller, this would appear in the centre of the first chamfered cylinder object. This object wouldn't need a mesh smooth.
To finish off the centre I needed to make an object that sort of wrapped around the centre chamfer cylinder. This would be where the wheels spokes would attach from. I made a standard cylinder object with 14 sides that would be larger than the chamfer cylinder and applied a mesh smooth.
The final stage of the wheel would be creating the spokes that fill the middle. I started by just creating a single rectangle to get the rough size and shape of a single spoke. Converting the rectangle object to an editable poly allowed me to change the points at either end of the rectangle to make the object look as if it was moulded to the wheel frame and the wheel centre.
I applied a mesh smooth to the object which gave the rectangle a more realistic look for the metal poles that make the wheels spokes. Cloning and rotating the objects gave me the desired look for the wheel.
Before saving the object I named each part of the wheel so later on in the project there would be less confusion when everything is combined. I also grouped all the objects together to allow for easy rotation and animation later on.
Below is the finished model with no textures applied.


No comments:
Post a Comment